Sunday, July 31, 2011

Friendship Bread


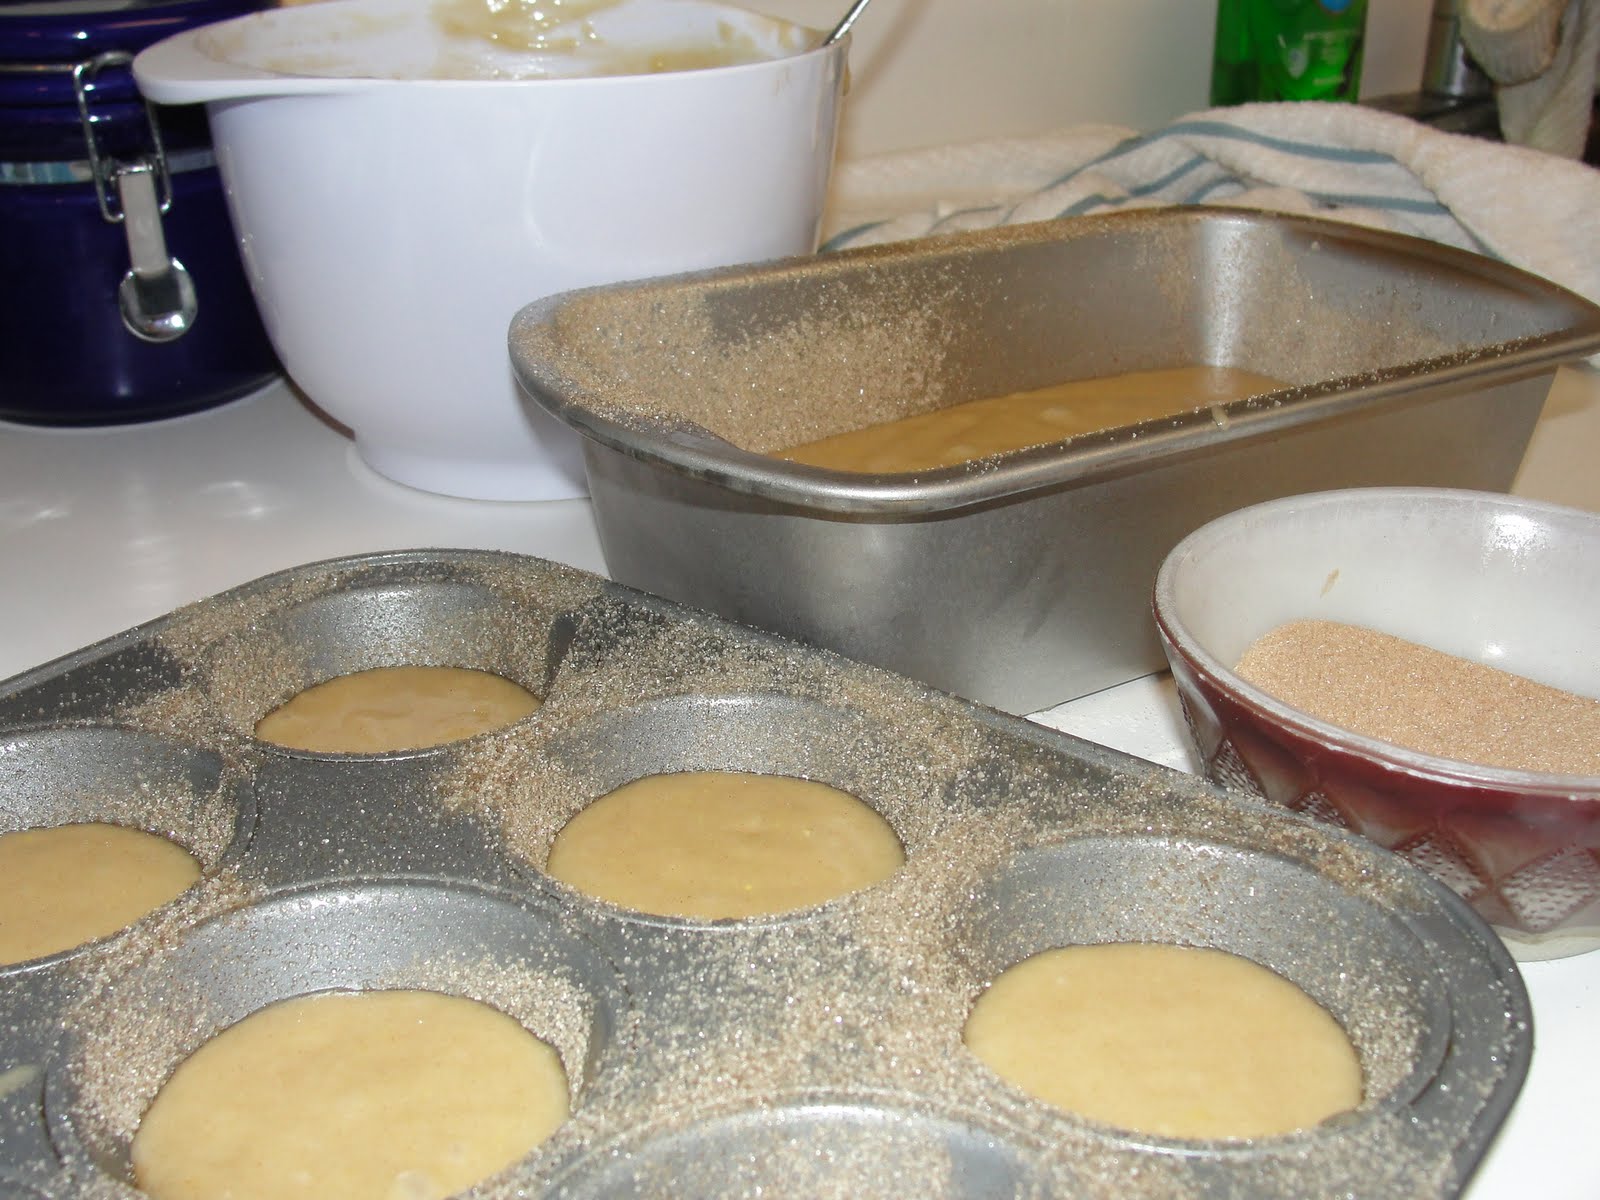
Every couple of years, Amish Friendship Bread starters begin circling. And I am easily lured by the siren song of this delicious, cinnamony-sweet bread. That is, until the starters begin to multiply like bunnies in my kitchen, and I realize that I don't know enough people with a desire to bake to unload all of it! 

And after a few weeks, I decide that if I ever have to eat, much less bake, another loaf of friendship bread, I'll have to hurl. And if I ask one more friend to take a starter, I won't have any more friends.

But, while it lasts - - - before the hurling and ruined friendships set it - - - it sure is fun!


Delish!  

(Anybody want a starter?)


Happy stitching (and baking!),

Kelly

Thursday, July 14, 2011

The Gift of Serging


So, a little backstory here: I have a friend, Meghan. My sister, Karen, can claim her as a friend first, but I got to know her since I moved back to the area, and now she's my friend, too!

I love Meghan for a variety of reasons, which include but are not limited to the following:

Ohio Valley Antique Mall - LOVE LOVE LOVE!!!!!
  • She introduced me to the Mother Ship of antique stores, The Ohio Valley Antique Mall, and took me there and shopped with me all afternoon, and encouraged my trivial purchases but discouraged the extravagant ones.
  • She refers to both me and my sister as "Sister Biscuit". I'm not sure why this makes me laugh, but it does...a lot. I'm laughing a little bit now in memory of it....
  • She made me brownies. Do you remember in Home Alone when Kevin says, "A delicious cheese pizza, just for me."? That's how I felt when Meghan gave me a pan of delicious brownies, just for me.
  • We enjoy a similar love and affinity for crafting, sewing, and the supplies that come along with them. Meghan also understands that crafting is a dark mistress that can suck away both your time and money, but despite that fact, she understand like I do that it's impossible to quit. There's no patch for sewing...


And now she's MOVING AWAY!!!!!!!  BLERG!!!!!!

In her great wisdom, Meghan knew that the only thing that could possibly ease my sorrow and dry my tears was a small token of love. (I choose to believe that it was a token of love, but in reality, she didn't want to move it, but those are pretty much the same thing to me.)


She arrived on my doorstep on Friday with a box full of miracles and wonderment!


This simple cardboard box was a veritable treasure trove containing A SERGER, some pins, a pair of fancy paper scissors and a sparkly headband. All amazing, for sure.


I won't lie, I have no idea how to serge. I've never touched one in my life. In fact, taking these photos constitutes the closest I've ever been to one. But I'm gonna' learn! I will!


Am I wrong to be nervous by all of the thread?


Definitely gonna' have to change the needle first...


Thank you, Meghan, for my brand-spankin' new-to-me serger! 
I promise to think of you every time I break a thread!


XOXO,

Kelly

Sunday, July 10, 2011

If you love to read...

I know it's not technically "stitchy" or "quilty", but it is stuff, and I HAD to share it with all of you...

I found this piece through a link from my sister's awesome blog, Conceptual Reception. Seriously, check her blog out—Karen's an amazing writer and poet, and has a total knack for making me laugh and cry and ponder all at the same time. (And yes, we're both still this cute!)

Sisters, already reading


Date a Girl Who Reads by Rosemarie Urquico 

Date a girl who reads. Date a girl who spends her money on books instead of clothes. She has problems with closet space because she has too many books. Date a girl who has a list of books she wants to read, who has had a library card since she was twelve.
Find a girl who reads. You’ll know that she does because she will always have an unread book in her bag. She’s the one lovingly looking over the shelves in the bookstore, the one who quietly cries out when she finds the book she wants. You see the weird chick sniffing the pages of an old book in a second hand book shop? That’s the reader. They can never resist smelling the pages, especially when they are yellow.
She’s the girl reading while waiting in that coffee shop down the street. If you take a peek at her mug, the non-dairy creamer is floating on top because she’s kind of engrossed already. Lost in a world of the author’s making. Sit down. She might give you a glare, as most girls who read do not like to be interrupted. Ask her if she likes the book.
Buy her another cup of coffee.
Let her know what you really think of Murakami. See if she got through the first chapter of Fellowship. Understand that if she says she understood James Joyce’s Ulysses she’s just saying that to sound intelligent. Ask her if she loves Alice or she would like to be Alice.
It’s easy to date a girl who reads. Give her books for her birthday, for Christmas, and for anniversaries. Give her the gift of words, in poetry, in song. Give her Neruda, Pound, Sexton, Cummings. Let her know that you understand that words are love. Understand that she knows the difference between books and reality but by God, she’s going to try to make her life a little like her favorite book. It will never be your fault if she does.
She has to give it a shot somehow.
Lie to her. If she understands syntax, she will understand your need to lie. Behind words are other things: motivation, value, nuance, dialogue. It will not be the end of the world.
Fail her. Because a girl who reads knows that failure always leads up to the climax. Because girls who understand that all things will come to end. That you can always write a sequel. That you can begin again and again and still be the hero. That life is meant to have a villain or two.
Why be frightened of everything that you are not? Girls who read understand that people, like characters, develop. Except in the Twilight series.
If you find a girl who reads, keep her close. When you find her up at 2 AM clutching a book to her chest and weeping, make her a cup of tea and hold her. You may lose her for a couple of hours but she will always come back to you. She’ll talk as if the characters in the book are real, because for a while, they always are.
You will propose on a hot air balloon. Or during a rock concert. Or very casually next time she’s sick. Over Skype.
You will smile so hard you will wonder why your heart hasn’t burst and bled out all over your chest yet. You will write the story of your lives, have kids with strange names and even stranger tastes. She will introduce your children to the Cat in the Hat and Aslan, maybe in the same day. You will walk the winters of your old age together and she will recite Keats under her breath while you shake the snow off your boots.
Date a girl who reads because you deserve it. You deserve a girl who can give you the most colorful life imaginable. If you can only give her monotony, and stale hours and half-baked proposals, then you’re better off alone. If you want the world and the worlds beyond it, date a girl who reads.
Or better yet, date a girl who writes.


Sound familiar?

Kelly

Thursday, July 7, 2011

The Joy of the Mug Rug

I have emoted on and on in previous posts about how much I love making/stitching/quilting little projects. To recap, my main reasons for this crazy love:
  • You get to use up your scraps.
  • You can try new techniques on something that doesn't take months and months.
  • You can try new quilting patterns.
  • They're fast!
  • They're easy!
  • They're adorable!
  • And . . . they're frequently USEFUL!
Useful things are the best, particularly useful things that you can use on a day-to-day basis. 

Case in point: The Mug Rug.

Yeah, that's me. Looking totally crazy and geeked-out over my new mug rug...

I have to tell you, when I first heard about mug rugs, I was skeptical. Something about the name was too sweet for me, and I couldn't get my head wrapped about why you would want a place mat just for your mug. 

I get it now. I have fully and completely embraced the joy of, not only making, but also using a mug rug.

We swapped mug rugs at a meeting of the Cincinnati Modern Quilt Guild months and months ago, but I just came across the pictures and thought I'd share what I made and received. For the swap, we each paired up with a partner the month before the swap took place, and gave them our favorite mug for inspiration. I brought in one of my orange Fire King mugs—LOVE (you can see it on the far left below).


The mug rug that I received in the swap was made by my friend, Amy, and it has been on my bedside table for my evening cup of coffee ever since. 


I made this one—a mini Dresden plate appliquéd onto a polka dot background. I used a lot of topstitching around the plate center to add some stitching detail, and I pieced the binding from some of my scraps—it was completely unintentional, but the way the binding fell around the edge made it look striped which was cool.


 It's kind of hard to see in the photo, but I shadow-quilted around the plate, repeating the ripples all the way to the edges of the rug.

(Now I kind of want to go make another one...)

Happy Stitching!

Kelly

Monday, July 4, 2011

Easy Baby Boy Quilt

I've discovered that in your late twenties and early thirties, EVERYONE HAS BABIES! This is a wonderful thing, because who doesn't love babies? The result, however, of your best friends having babies year round is that we quilters make baby quilts year round.

Now, some people may find making baby quilt after baby quilt a little tedious, but I absolutely love making them for a few reasons:
  1. They're fast and offer immediate quilty gratification. 
  2. It's wonderful to make something that you know will be loved and very well used.
  3. They offer a great excuse to try out new patterns, fabrics, and quilt designs. 
  4. Handmade gifts really show that you care!


In this specific case, I care a lot! Jess has been one of my best friends for almost 10 years now—as I type it, I can't really believe it's been that long! Jess and her husband have a beautiful family, and have a brand new little member due any day now. Because of my extensive traveling in my previous career, I haven't been around for the births of her previous children; I really wanted to try to make up for lost time with this new baby. And I absolutely had to make this new baby boy a quilt.

This quilt couldn't be any simpler—it's fast, it's sturdy, you can use up your big scraps, and it's easy to adapt for a girl version. I absolutely love how it turned out!

Easy Baby Boy Quilt Tutorial
Finished size: 36.5" x 36.5"

Materials:
(32) 5" solid gray squares
(32) 5" colorful print squares (8 Green, 8 Yellow, 8 Red, 8 Blue)
Backing fabric: approximately 41" x 41"
Binding: approximately 158" of 2.5" wide blue binding (cut four 2.5" strips from selvage to selvage)
Pencil

Instructions:
1. With a pencil, draw a diagonal line on the wrong side of each gray square. Place each gray square right sides together with a print square. Sew 1/4" seam on either side of the drawn line. Cut along the drawn line to create two half square triangles. Press both halves open. Repeat to make 64 half square triangles.


2. Arrange the half square triangles in the desired configuration of 8 rows of 8 blocks in each. There are a ton of different ways you can arrange your blocks, so have fun! I suggest taking a digital photo of each arrangement. Quickly flipping through photos makes it easier to choose a configuration, and if you want to re-create a previous configuration, you have a photo to help you arrange it again.

3. Begin sewing your half square triangles together in 2 x 2 blocks. Carefully line up all of the diagonal seams by peeking into the seam allowance. Pin pin pin! And make sure you are sewing an exact 1/4" seam; a larger seam will cut off the point of your triangles. 


4. Sew the blocks together into rows, and sew the rows together to complete the quilt top.

5. Now quilt it! I used a fairly close meander quilting design using gray thread. Since it's a baby quilt and will actually get some heavy use, I wanted to do a pretty heavy-duty quilt job. This quilt was my first go on my Mom's new longarm! Woohoo!!!!!  It was surprisingly easy, extremely fast, and definitely addictive......


6. Bind it! Here's a trick for you—after you make and fold your binding, wrap it around a paper towel tube. This keeps it from getting tangled and messy while you sew it on. Sew your binding to the back of the quilt first....
                                    

7. ....and then wrap the binding around to the front so the folded edge of the binding just overlaps the stitched line. Sew along the folded edge, attaching the binding to the front. This method of binding is a little sturdier than hand stitching it, which I think is important for a quilt that will get a lot of love and washing!


And there you have it! Finished baby boy quilt!  The same quilt would be extremely easy for a baby girl: use a white background with pastel colors in the same layout and Voila!


Hope you enjoyed, and happy stitching!


Kelly


Friday, July 1, 2011

Spoonflower Delivery

Ok, so let's be honest. Mail is awesome. Parcels and boxes are better. When the parcels contain fabric, it's the best of all. Gleeful, even. Jump-up-and-down inducing! 

When I opened my mailbox this afternoon and discovered my Spoonflower order had arrived, I actually squeaked a little. Honestly, I giggled, squeaked, ran inside my apartment, and threw my bills in a heap on the counter, all in my excitement to tear open a package that I ordered myself. That's the funny thing about fabric—it's like ordering yourself a present! 

(insert contented sigh of fabric happiness here.)


Now, I should get massive credit for containing my Christmas morning instincts and not ripping this envelope open as I ran up the stairs. Or sitting on the curb and tearing it open in the street. No, I waited until I could get my camera and take pictures of this magical moment to share with you. 

And then I ripped it open.


In case you're not familiar with Spoonflower, they're a Web-based company that allows you to design your own fabric, and print actual yardage through the company. You can also put your designs up for sale via their site. Ummm, amahzing. I haven't designed any fabric yet because I have absolutely no design-y, graphic-y, illustrator-y skills whatsoever. My skills lie more in creating fun new words with the use of hyphens. Like graphic-y...

I've been wanting this particular print for ages now, and next months' swap through the Cincinnati Modern Quilt Guild gave me the perfect excuse to order it. Next month, we're swapping Spoonflower charm squares, and this print will be my contribution. I can't wait to see what everyone else picked out!!!  

I have to say, I'm extremely impressed with the personal touches from my order. 

The fabric was wrapped in tissue paper, and I received a Spoonflower label.


And my receipt had a handwritten note (from another Kelly - awesome! Hi, Spoonflower Kelly!)


And, most importantly, the fabric is beautiful and just what I was hoping for!


The moral of this story: 
Packages are awesome, fabric is great, Spoonflower is fantastic, and I am one happy little sewer!


As always, happy stitching!

Kelly

Wednesday, June 29, 2011

Giveaway Winner!

Thanks to everyone who participated in the Amy Butler Fat Quarter Giveaway this past week! Keep reading—there's lots of fun stuff to come in the future!


AND THE WINNER IS . . .  

Pat V.
Congratulations! I hope you have lots of fun with this fabric, and please send photos of your Farmer's Wife blocks—I can't wait to see them!


Happy stitching, and thanks for participating!

Kelly

Wednesday, June 22, 2011

Quilt Fabric Giveaway!

This giveaway all stems from a great find at the AQS show in Columbus this past weekend. The show was amazing, as always, and the vendors were fantastic. But after about six hours, I was completely exhausted. I considered lining up some folding chairs and taking a little nap, but I looked around and figured that if all these ladies could keep hoofing it, so could I. So I pressed on. 

And my endurance paid off. 

I rounded a corner I had already been around twice, and noticed what I hadn't before: a trunk full of Westminster fat quarters marked at . . . $1 each!!!!!

WHAT!??!?!

I dove into that trunk like I hadn't seen fabric in years. The vendor seemed slightly concerned 
at my almost hysterical excitement as I tore through the trunk.

"It's all Amy Butler!" I kept saying over and over. 

"Yes, I know dear," she responded cooly, still shaking her head at the crazy girl wildly 
accumulating fat quarters.

At one point, I think I actually jumped up and down a few times, clapping my hands like a four year old who's getting a lollipop. Or a trained seal who's getting fish.

Either way, I scored big on the fabric front, and I'd like to share my good fortune with one of 
you. Consider it a little thank you for taking the time to read my blog when there are so many out 
there to choose from.

Here's the giveaway deal:

One lucky person will receive.....


6 gorgeous Amy Butler fat quarters (some from "Love", some from "Midwest Modern")

This giveaway is now closed.
Here's what you need to do:
  1. If you're not already, become an official follower of my blog by                                               clicking the follow button on the right.
  2. Leave a comment telling me what you'd do with the fabric if you win.


The giveaway will close on Wednesday, June 29th at 5pm EST. One winner will be chosen to receive all 6 fat quarters with a random number generator.

Tell your friends, and thank you!


Happy stitching,

Kelly

Sunday, June 19, 2011

Pincushions!

The most recent swap at my branch of the Modern Quilt Guild was a pincushion swap. I love swapping with the ladies in my group because, even though we all classify ourselves as "modern" quilters to some degree, everyone's handmade items always look completely different. Pincushions are also usually quick and easy to make, and they serve a purpose which I love! 

I got really productive for a short window of time and was able to make two pincushions for the swap. I brought this one:


and this one:

I was super lucky to get these two little gems in returns. The amazing bird with vintage hat pins was made by Victoria of The Granny Diaries, and the darling embroidered and appliqued linen cushion was made by Sarah of Stash Resolution.


Ummmm, how awesome are they?!?!?  (Answer: Totally awesome.)

If you are now totally inspired to go make your own pincushion or organize your own swap, do it! Pincushions are as simple or as difficult as you want to make them, and are a great place to let your creativity run free and try something new. 


Striped & Tufted Pincushion Tutorial

Gather your supplies: Stuffing (Fiber Fil), bowl to trace around, scissors, fabric pen, large decorative button (Note: A button with holes as shown will work, but one with a shaft is much easier for this project), embroidery floss, large eyed needle, thimble, a pieced fabric panel large enough to cut out two circles (size of your bowl).


Trace two circles (using the bowl/glass as a template) onto the fabric panel. Cut out the circles. Place them right sides together. Pin and sew around the outside edge using 1/4" seam. Leave a small opening for turning; make sure the opening is not on a seam.

Turn the pincushion right side out. Press the edges of the opening under 1/4" with a hot iron. Stuff the pincushion very full with Fiber Fil. 

Handstitch the opening closed. I have little tags that say "PS I love you". I stitched one of the tags into the opening. You could do something similar with a doubled piece of coordinating ribbon. Or, you can just stitch the opening closed without anything in it. Your call. I just like the little extra touches.

Cut a fairly long piece of embroidery floss (use all 6 strands). Thread one end through the needle and knot the other end. Stitch up through the back of the pincushion directly in the center. Wrapping the thread around one edge, stitch up through the center of the pincushion in the same way; the thread will wrap around the edge and will tuft as you pull. Continue doing this as much as you like to create the tufting in the cushion. When you have finished adding tufting to the cushion, your needle and thread will be on the top side of the cushion.

Thread the needle through the shaft of a large button. Stitch back down through the center of the cushion, pulling the thread tight. The shaft of the button should sink down into the center of the cushion very easily. 

Turn the cushion to the back. Cut off the needle, leaving about a 6" long tail. Split the embroidery floss into two sections and tie 4–5 tight knots to secure the button and the tufting. Trim the thread tails close to the knots.


All done! Stick some pins in and you're good to sew!


Happy stitching!

Kelly

Friday, June 10, 2011

SUMMER nesting!

It might just be me, but there’s definitely something about the warm weather and the sunshine that lights a spark in me! I feel like I’ve been hibernating or dodging raindrops for months, but now it’s SUMMER (yes, all in caps) and everything is shiny and new again. (For those of you familiar with the book, this season also brings out all of my "Anne of Green Gables" prosaic tendencies...)! And with the shiny newness of SUMMER comes a desire to do a little “nesting.” Below is photo evidence of my own summer nesting endeavors - - - so so much fun!

SUMMER strawberries!
Homemade pain au chocolat

Ummm, brunch. Need I say more?
First homemade ice cream of the summer
Yeah, totally delicious. Too delicious. Dangerously.
Birthday cupcake - butter pecan flavored
"Window" boxes on my balcony
Tiny birdhouse in my potted plant
Just awesome SUMMER colors! Maybe my next quilt...

It took some doing, but I found a cake plate that wasn't super expensive!
 I don't know why cake plates feel summery, but they do!
Really, is there anything better than fresh flowers and night lights?
Itty bitty herb planters. Crossing my fingers...
Oh look, my very ordinary front door wreath...
But what's that?

A nest! Hanging out on my front door!

If you look really close, you can see baby bird beaks!


As I'm sure is true for most of you, too, SUMMER sewing is generally made up of sewing baby quilts, wedding presents (see my previous post for a great idea) and house warming items. And then the next thing you know, it’s October and time to start on Holiday gifts, but that’s another post…

For now, it might be hot, it might be muggy, but it's not snowing!!!!  I'm no photographer, but SUMMER seems to make all of my photos look better, so get outside and start snapping! It's so easy to be inspired when the weather's beautiful, and some of these photos will help me get inspired in 8 months when it's freezing outside.


XOXOXO

Kelly