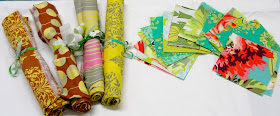
Hello my lovely internet friends! I have a mug rug swap coming up at my next Cincinnati Modern Quilt Guild meeting and I decided to play around with some of the uber delicious scraps that are piling up from my Swoon Quilt.
If you haven't heard of or made a mug rug before, let me put you at ease. There are no rules when it comes to mug rugs! Essentially, a mug rug is a mini-placemat for a mug of tea and a cookie to go on. (Or in my case, a cup of coffee and a scone.) So, don't stress about how big to make it or anything else you may think of to worry about. Mug rugs are great to try your hand at something new, to do some improvisational piecing, or to use up a pile of scraps.
This mug rug will finish approximately 8" x 10", but you can easily make adjustments to make it larger or smaller.
Eco-Friendly Geese Mug Rug
(because the geese are green. . . . get it?)
- Cut (5) 4.5" x 2.5" green print rectangles
- Cut (10) 2.5" x 2.5" dark background squares
- Cut (1) 4.25" x 10.5" dark background rectangle (not shown)
Using the background squares and the green rectangles, make 5 flying geese units. Refer to the
tutorial here for help, or to the photos below. Be sure to sew ON the diagonal line, not 1/4" away from it (like you do when make half square triangles).
Line up your finished and pressed flying geese units in a vertical row. I pointed all of my geese in the same direction, but maybe one of your geese is flying the wrong way—who knows? Have fun!
Sew the vertical column of geese together, using a really crisp 1/4" seam. My geese certainly aren't perfect and that's okay because guess what? Somebody's gonna' sit a mug 'o joe on this bad boy and stain it anyway. I'm not gonna' agonize over every single point.
THAT SAID: the goal is to have perfect points - the point touching the goose above it without being cut off.
Press your geese unit really well when you're finished.
Sew the large background rectangle to the right side (or the left side - you pick! I'm bossy, but hey, do what you want!) of your geese unit.
(Note: I was using up scraps, so I pieced my side rectangle, which is why you can see seams in the photo. Feel free to piece your side rectangle too, if you need to, or simply cut a whole rectangle from one piece of fabric.)
Layer with batting and backing just like normal...
Baste . . .
Quilt and bind...
I used this yummy variegated cotton thread because I wanted to play around with the quilting and really have it show up.
Make a cup of tea or brew up a pot of coffee, and enjoy!
Happy Stitching!
Kelly


